Welcome to our Knowledge Base
-
System Settings
-
- System Settings Getting Started (Video)
- Upload Students (Video)
- Upload Students
- Upload Student Pictures
- User Permissions
- SFTP Automated Student Rosters
- Microsoft Single Sign-On (SSO)
- Safari Web Browser
- System Requirements
- Whitelist URL's
- Spirit Point Reward Tracking
- Google Single Sign-On (SSO)
- Status
- Automated Intervention Extract
-
- Upload User Accounts
- User Accounts
- Upload Students
- Upload Students (Video)
- Upload Student Pictures
- User Permissions
- Manage Family and Guests
- Mass Updates
- Manage Students
- Microsoft Single Sign-On (SSO)
- Preparing for Next School Year
- Printer Setup - 3" Thermal (Windows)
- Printer Setup - 3" Thermal (Mac) **Advanced Setup**
- Printer Setup - 3" Thermal Network (Mac) **Advanced Setup**
- Google Single Sign-On (SSO)
- Classlink
- District Admin
- Show all articles (2) Collapse Articles
-
-
Store
-
- Changing Payment Type After Transaction has Completed
- Creating a Transaction
- E-mail Receipts
- Exporting Ticket Sales from Store to Ticketing for Checkin
- Modify Transaction - Post Sale
- Payment Type
- PAX Credit Card Reader Setup
- Portal Purchased Product Pickup and Reports
- Product Buttons
- Printing Receipts
- ProPay: How to Process Credit Cards
- ProPay: How to Void a Transaction
- Scanning a Student ID
- Returns
- Reprint Receipt and Resend Receipt by E-mail
- Student Credit
- Student Credit - Credit Refunds
- Discount Options
- Convenience Fee
- Student Alerts
- Show all articles (5) Collapse Articles
-
- Manage Products
- Barcodes
- Categories
- Configure your Portal and Products
- Inventory
- Mass Product Updates
- Mass Product Update (Video)
- Product History (Link on Current Transaction)
- Product Groups
- Product Agreement
- Store Importing Products
- Vendors
- Account Codes
- Duplicate Product
- Store Imports
- Student Alerts
- Show all articles (1) Collapse Articles
-
- Family and Guest Management
- Manage Spirit Points
- Manage Students
- Manage Family and Guests
- Mass Updates
- Student Credit
- Student Credit - Credit Refunds
- Discount Options
- Student Type
- Managing Student Credit
- Student Spirit Points
- Upload Students
- Upload Student Credit
- Upload Student Pictures
- Upload Students (Video)
- Add Students
- Student Negative Account Balance
- Student Alerts
- Show all articles (3) Collapse Articles
-
- Accessing the Student Only Store Portal
- Accessing the Open Store Portal
- Configure your Portal and Products
- Family and Guest Management
- Google Single Sign-On (SSO)
- Family Portal
- ProPay (Heartland) Merchant Account
- Manage Family and Guests
- Microsoft Single Sign-On (SSO)
- Portal Purchased Product Pickup and Reports
- Convenience Fee
-
- Accessing the Student Only Store Portal
- Accessing the Open Store Portal
- Configure your Portal and Products
- Cash Drawer (Connected to Thermal Printer)
- Cash Drawer (USB) Windows 10
- ProPay (Heartland) Merchant Account
- My Account
- PAX Credit Card Reader Setup
- Portal Purchased Product Pickup and Reports
- Product History (Link on Current Transaction)
- Product Agreement
- SFTP Automated Student Rosters
- School Logo
- Taxes
- User Accounts
- User Permissions
- Upload User Accounts
- Whitelist URL's
- Pay Open Invoice by Credit Card
- Account Codes
- Renewal
- Store Imports
- Show all articles (7) Collapse Articles
-
- System Settings Getting Started (Video)
- Mass Updates
- ProPay (Heartland) Merchant Account
- PAX Credit Card Reader Setup
- Google Single Sign-On (SSO)
- Microsoft Single Sign-On (SSO)
- School Logo
- User Accounts
- Preparing for Next School Year
- Remote Support
- Upload Student Pictures
- User Permissions
- Upload User Accounts
- Convenience Fee
- Classlink
- Account Codes
- Show all articles (1) Collapse Articles
-
Voting
-
- Adding an Election
- Adding Candidates
- Adding Officer Positions
- Adding Pictures and Biographies
- Archive and Retrieve Old Elections
- Create a Survey (Video)
- Election Layout Options
- Duplicate an Election
- Election Preflight
- Preview an Election
- Removing Candidates
- Using Video Biographies
- Write-in Candidates
- Rank Choice Voting
-
- Configure the Student Login Page
- Hobbies and Biography
- My Account
- Notifications for Unsuccessful Student Login Attempts
- Require Student E-mail
- Require Change Passwords
- SFTP Automated Student Rosters
- School Logo
- User Accounts
- User Permissions
- Upload User Accounts
- Whitelist URL's
- Pay Open Invoice by Credit Card
- Renewal
-
Ticketing
-
- Add Event
- Ticketing Attendance Report
- Check-In
- Display all Events
- Event Types
- Exporting Ticket Sales from Store to Ticketing for Checkin
- Mobile Check-in
- Pre-load Event
- Spirit Point Reward Tracking
- Sell Tickets
- Ticket and Check-in
- Link Store Ticket Sales to Ticketing 4 Schools
- Sell Tickets (New)
- Duplicate Event
-
- System Settings Getting Started (Video)
- Mass Updates
- ProPay (Heartland) Merchant Account
- Microsoft Single Sign-On (SSO)
- Google Single Sign-On (SSO)
- Upload Student Pictures
- User Accounts
- User Permissions
- Upload User Accounts
- School Logo
- Preparing for Next School Year
- Remote Support
- Classlink
- Convenience Fee
-
Interventions
-
- Bell Schedules
- Interventions
- Mass Updates
- My Account
- Printer Setup - 3" Thermal (Windows)
- Printer Setup - 3" Thermal (Mac) **Advanced Setup**
- Printer Setup - 3" Thermal Network (Mac) **Advanced Setup**
- SFTP Automated Student Rosters
- School Logo
- User Accounts
- User Permissions
- Upload User Accounts
- Whitelist URL's
- Pay Open Invoice by Credit Card
- Renewal
- Automated Intervention Extract
- Show all articles (1) Collapse Articles
-
Announcements
-
Student / Family Portal
-
Digital ID
Configure your Portal and Products
In this article, you will learn about configuring your ProPay merchant account to work with Store and Ticketing. Please follow this document if you have not already created a ProPay Account.
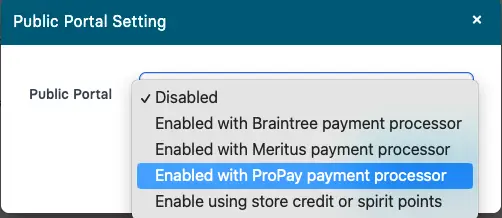
Store Enable Public Portal (System Value)
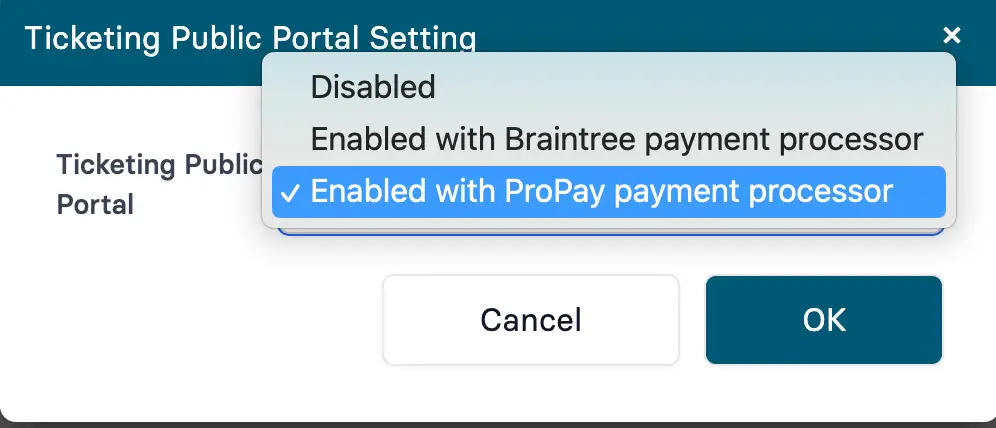
Ticketing Enable Public Portal (System Value)
Hardware - In Person Credit Cards
If you are using the in person integrated payment solution, please follow the instructios on this help doc to setup your PAX hardware.
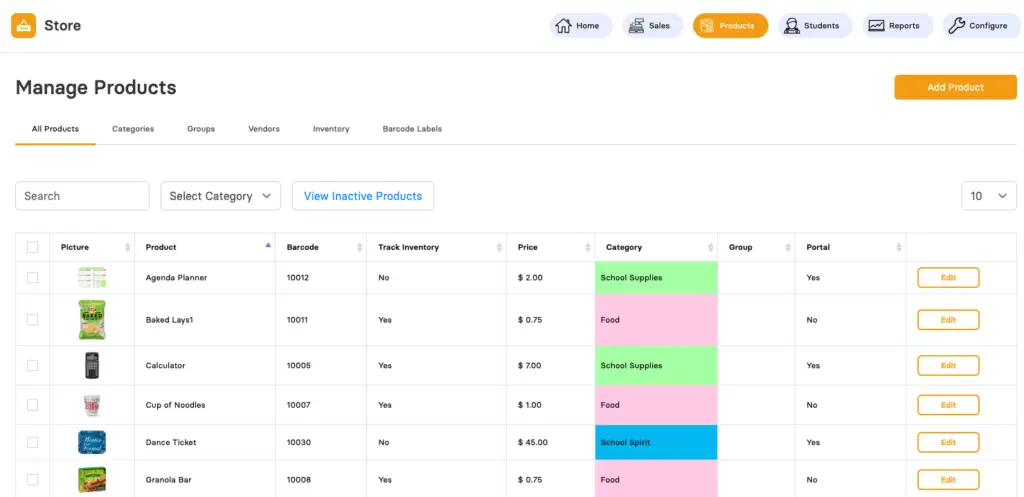
Store - Sell Item Online
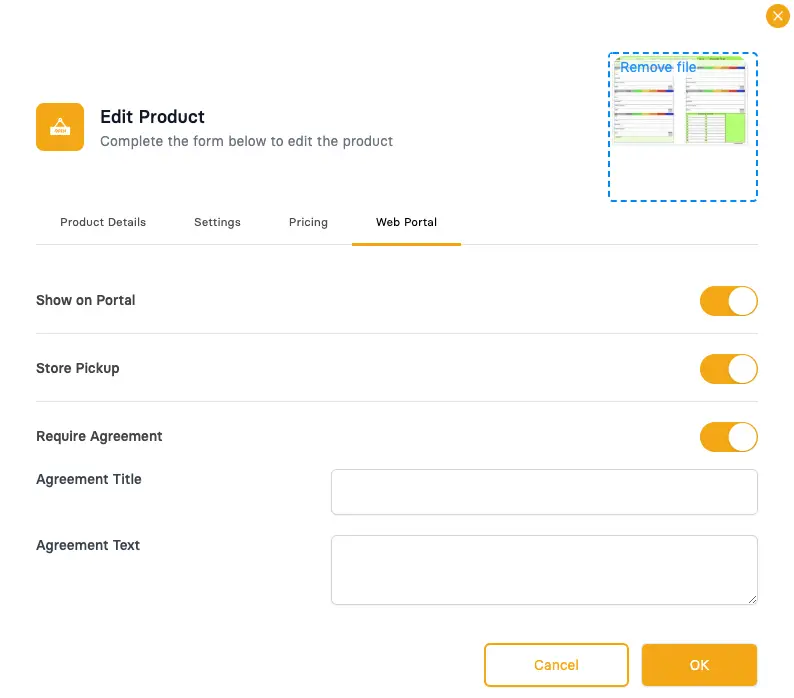
Show on Portal and Pickup
Show on Portal will display the selected product on the portal. If you do not want parents to purchase specific products, click on the toggle to turn it off.
Store Pickup allows parents to purchase an item online and then notifies the cashier that the student has purchased an item for pick-up. When an item is sold online, it will be removed from inventory so you can't oversell items that have not yet been picked-up. Leaving this on is good for physical items like a Binders and Sweatshirt. If you are selling digital item like a donation or dance ticket you might want to turn this off and it just records that the student made the purchase.
Portal URL The link / URL to your portal is the same as the link to your site with a "/portal" at the end.
For example if you have : https://myschool.store4schools.com/ as your site,
your portal will be https://myschool.store4schools.com/portal
your portal will be https://myschool.store4schools.com/portal
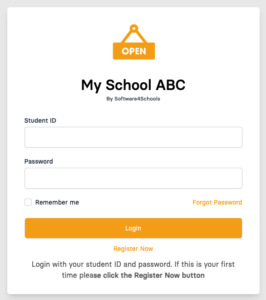
View for "Allow Anonymous Portal" = No
When a user goes to your portal page they will be prompted to login with student ID and Password. If this is the first time, they will use the register button.
View our Portal Walkthrough Help doc For more details on the user experience
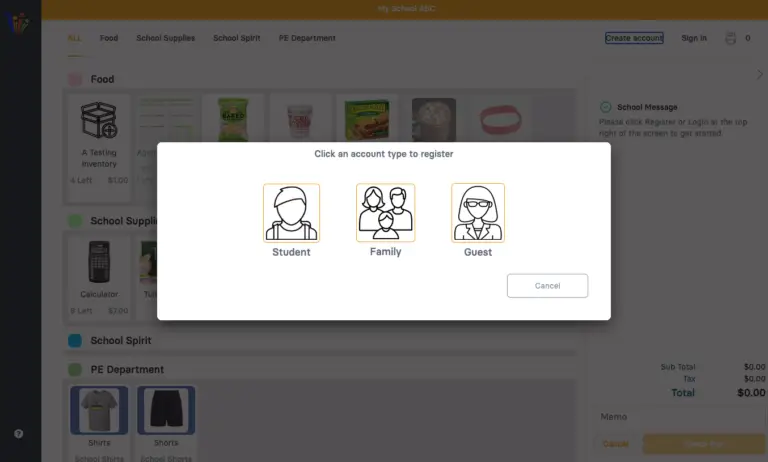
View for "Allow Anonymous Portal" = Yes
When a user goes to your portal page they will see all products except those that have the setting "Must be sold to a student". From there they can either Create an Account or Sign in by clicking on their user type.
View our Portal Walkthrough Help doc For more details on the user experience
Ticketing - Sell tickets online
-
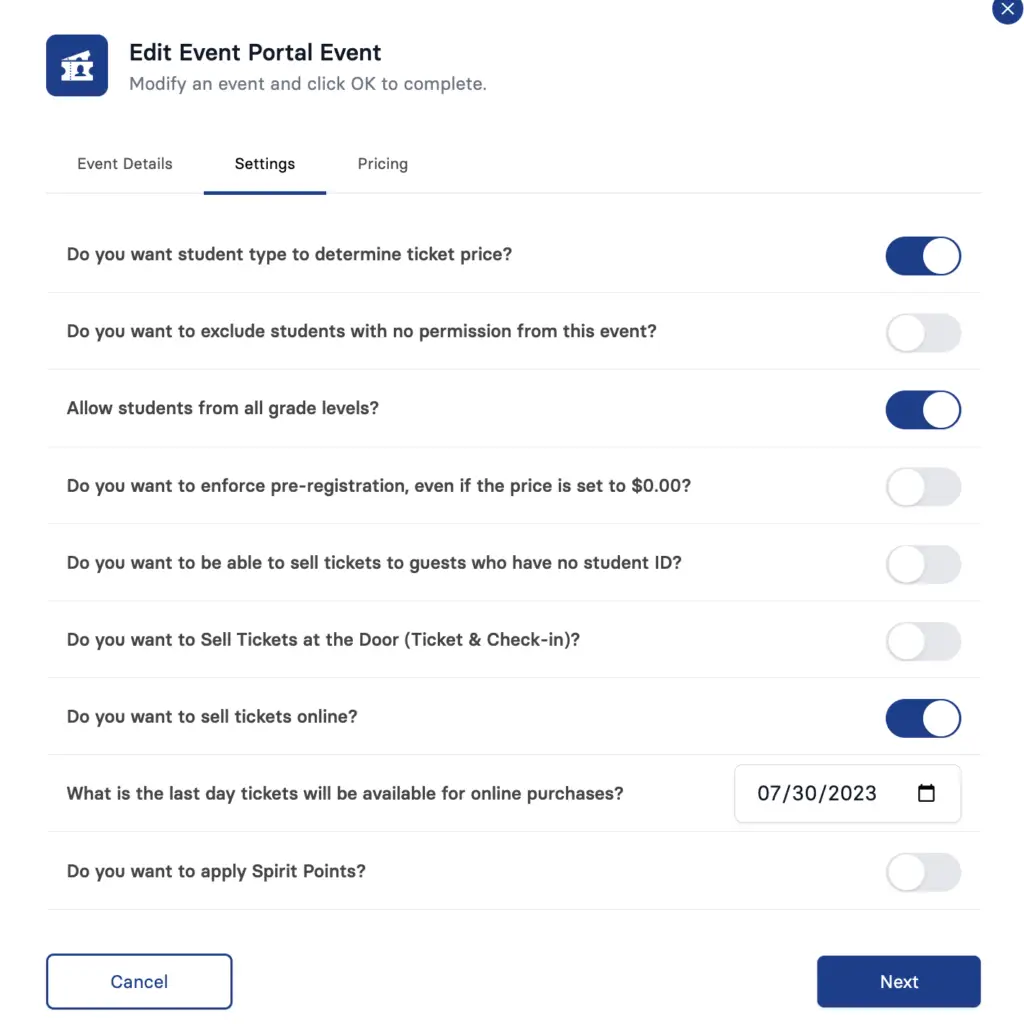
Do you want to sell tickets online? can be turned on to sell your tickets on the portal
-
What is the last day tickets will be available for online purchase? will display with a date option which is the last day that event will be viewable for sale on the portal.
When editing event setup, click on Settings to access the online sales option.
