Welcome to our Knowledge Base
Ticketing Attendance Report
-
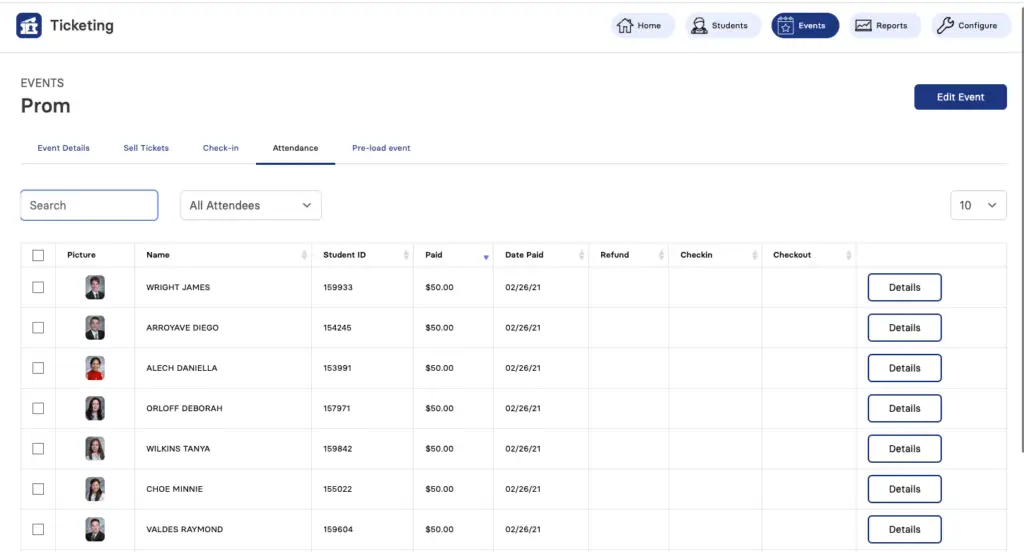
You can search for particular student by entering the text in the textbox. You can also use the dropdown next to the Search textbox to filter the records.
-
Filter your list by All Attendees, Students or Guest
-
Select one or more records by clicking on the checkboxes. Once selected, system will show more action buttons. Read below for more details.
-
Details – Action Items that can be done (see below)
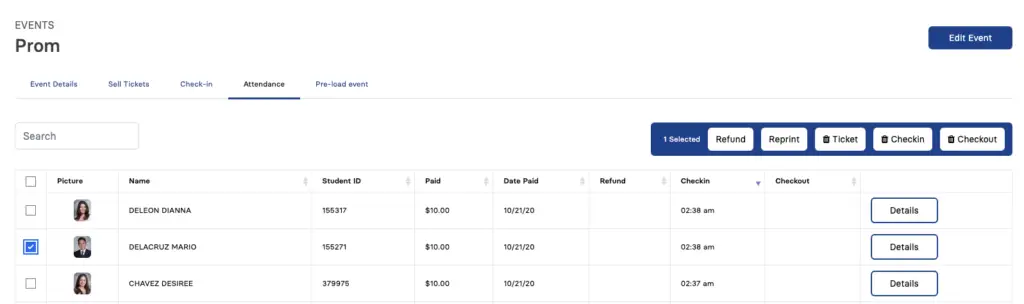
Click on the Events button from the top bar and select the tab for Attendance.
-
Check one or more tickets to turn on options for this screen.
-
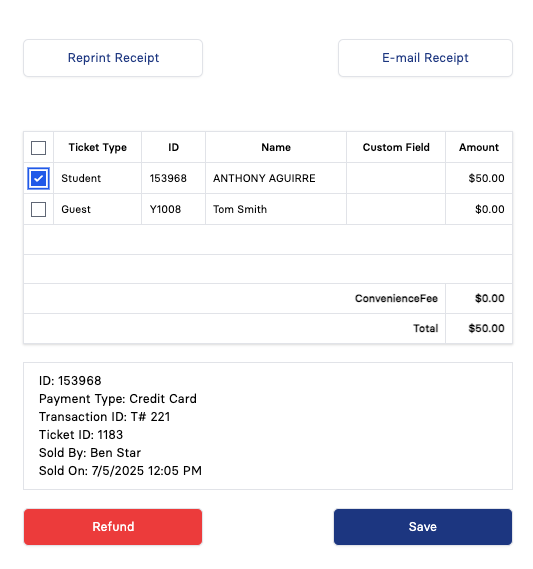
Reprint Receipt – When a ticket is selected you can reprint a receipt with a thermal printer.
-
Email Receipt – When a ticket is selected and student has an email address linked in their account this option will send an email copy of the receipt.
-
Details – When one or more tickets are selected you will see the details of that ticket. If a ticket has been refunded, the ticket will be red and on the right side of this details page you will see the refund details in red.
-
Refund – When this is clicked the Refund window will open up. (see issuing a refund below)
-
Select a record by clicking on the checkbox. System will show buttons with more options.
-
Refund – It will allow you to refund a ticket if the student has not attended the event. (see below for more details)
Reprint – It will print a duplicate ticket.
Delete Ticket – It will completely delete the ticket and the transaction for that student selected.
Delete Checkin – It will remove the check-in time for that student thus, allowing to check-in again.
Delete Checkout – It will remove the checked out time for that student thus, allowing to check-out again,
-
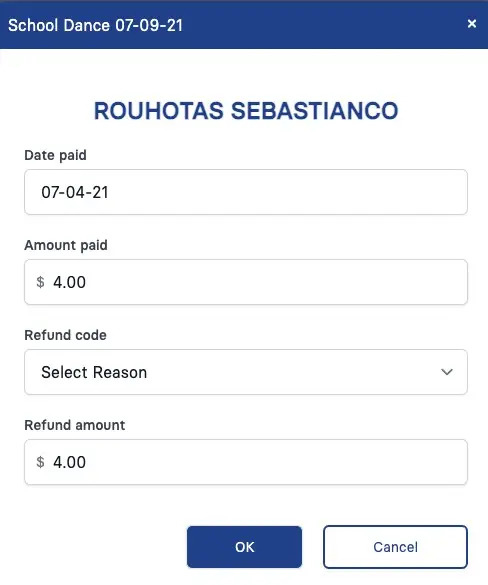
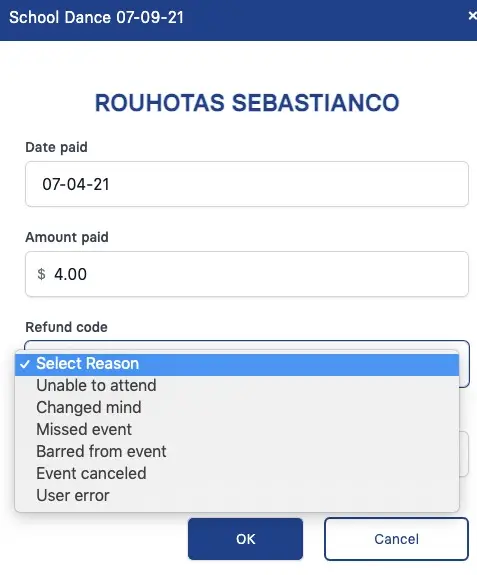
Select Refund Code / Reason from the dropdown.
-
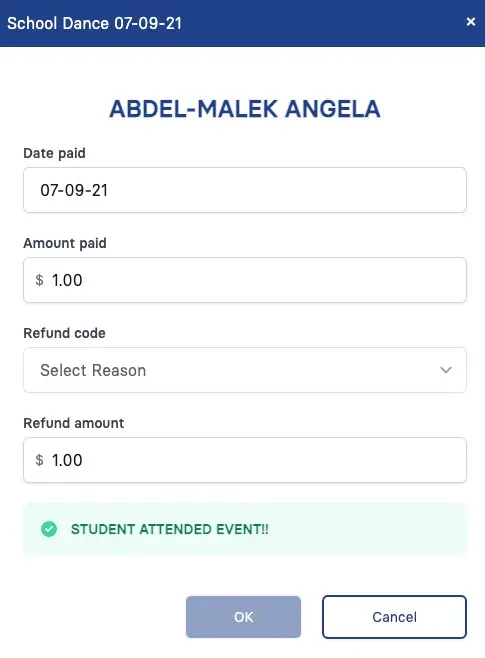
Review the changes and click on the OK button to complete the refund process.
Click on the Refund button appearing upon selection of the student from the list. A pop-up window will appear with refund details.
When you click on the Refund Code dropdown, the displayed list of reasons appear. Select the appropriate reason when issuing refunds.
In this case you cannot issue a refund because the student has already attended to event.
-
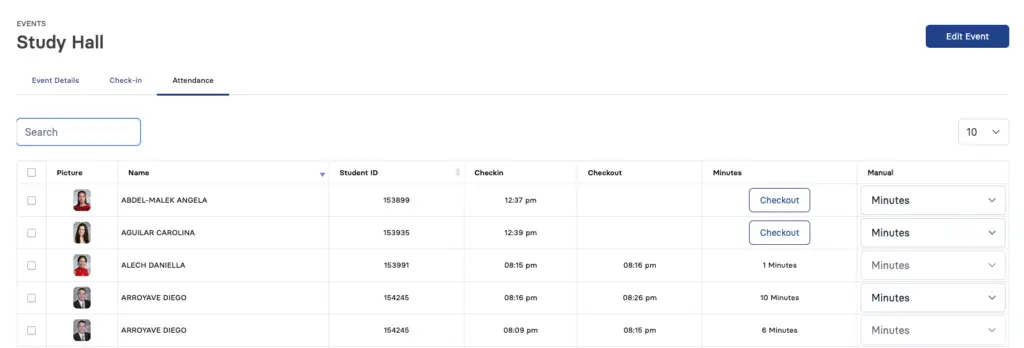
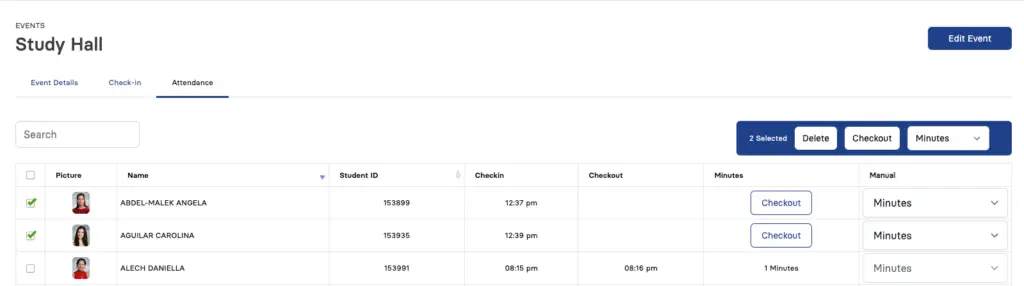
You can view the Checkin and Checkout times here against each student. The Minutes are calculated by the system.
-
In case the student did not check in/out properly, you have the option of setting up the minutes by selecting the Manual dropdown. The list of values in this dropdown are mentioned below or you can use the checkout button to use the current time.
This event type is appropriate for libraries, weekend academies, study hall, examination rooms, etc. In these cases, you may allow students to come and go but you still need to know how long they have been in the room. To access, select the tab for Attendance.
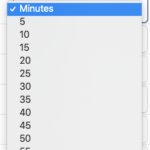
These are the available options in the Manual dropdown. You can select the appropriate value on basis of estimation. The maximum value is 60 minutes.
-
Check the boxes to the left of each student record.
-
The Checkout button will use the current time for the students exit
-
The number of minutes dropdown will allow you to set an exact number of minutes that students were in the event. This option can be used to check students out that have not yet been checked out or to update students that have already been checked out.
This option allows you to mass checkout students or adjust their checkout time